Decanting
Table of Contents
Use case #
Decanting mode allows Associates to load received products into the ASRS.
Decanting of products can be done only into empty bins.
However, the alert does not prevent the Associate from continuing to decant until the last empty bin is used. The Associate may use defragmentation mode to free up bins or empty bin reception mode to add more bins. The default value for empty bin alert is 10%. Site -> Overview page of Incloud UI highlights the number of empty bins and their percentage.
Workflow overview #
Two types of products can be decanted into the ASRS: products received from a supplier or products returned from a customer order that has been canceled. When decanting products from a supplier, the Associate may either decant under a new supplier order or continue decanting under an already open supplier order. The same applies to decanting a returned customer order. The following flow describes decanting product under a new supplier order.

- Associate activates decanting mode.
- Robots start driving toward the workstation with empty bins. Incloud screen displays “Summoning robots” message.
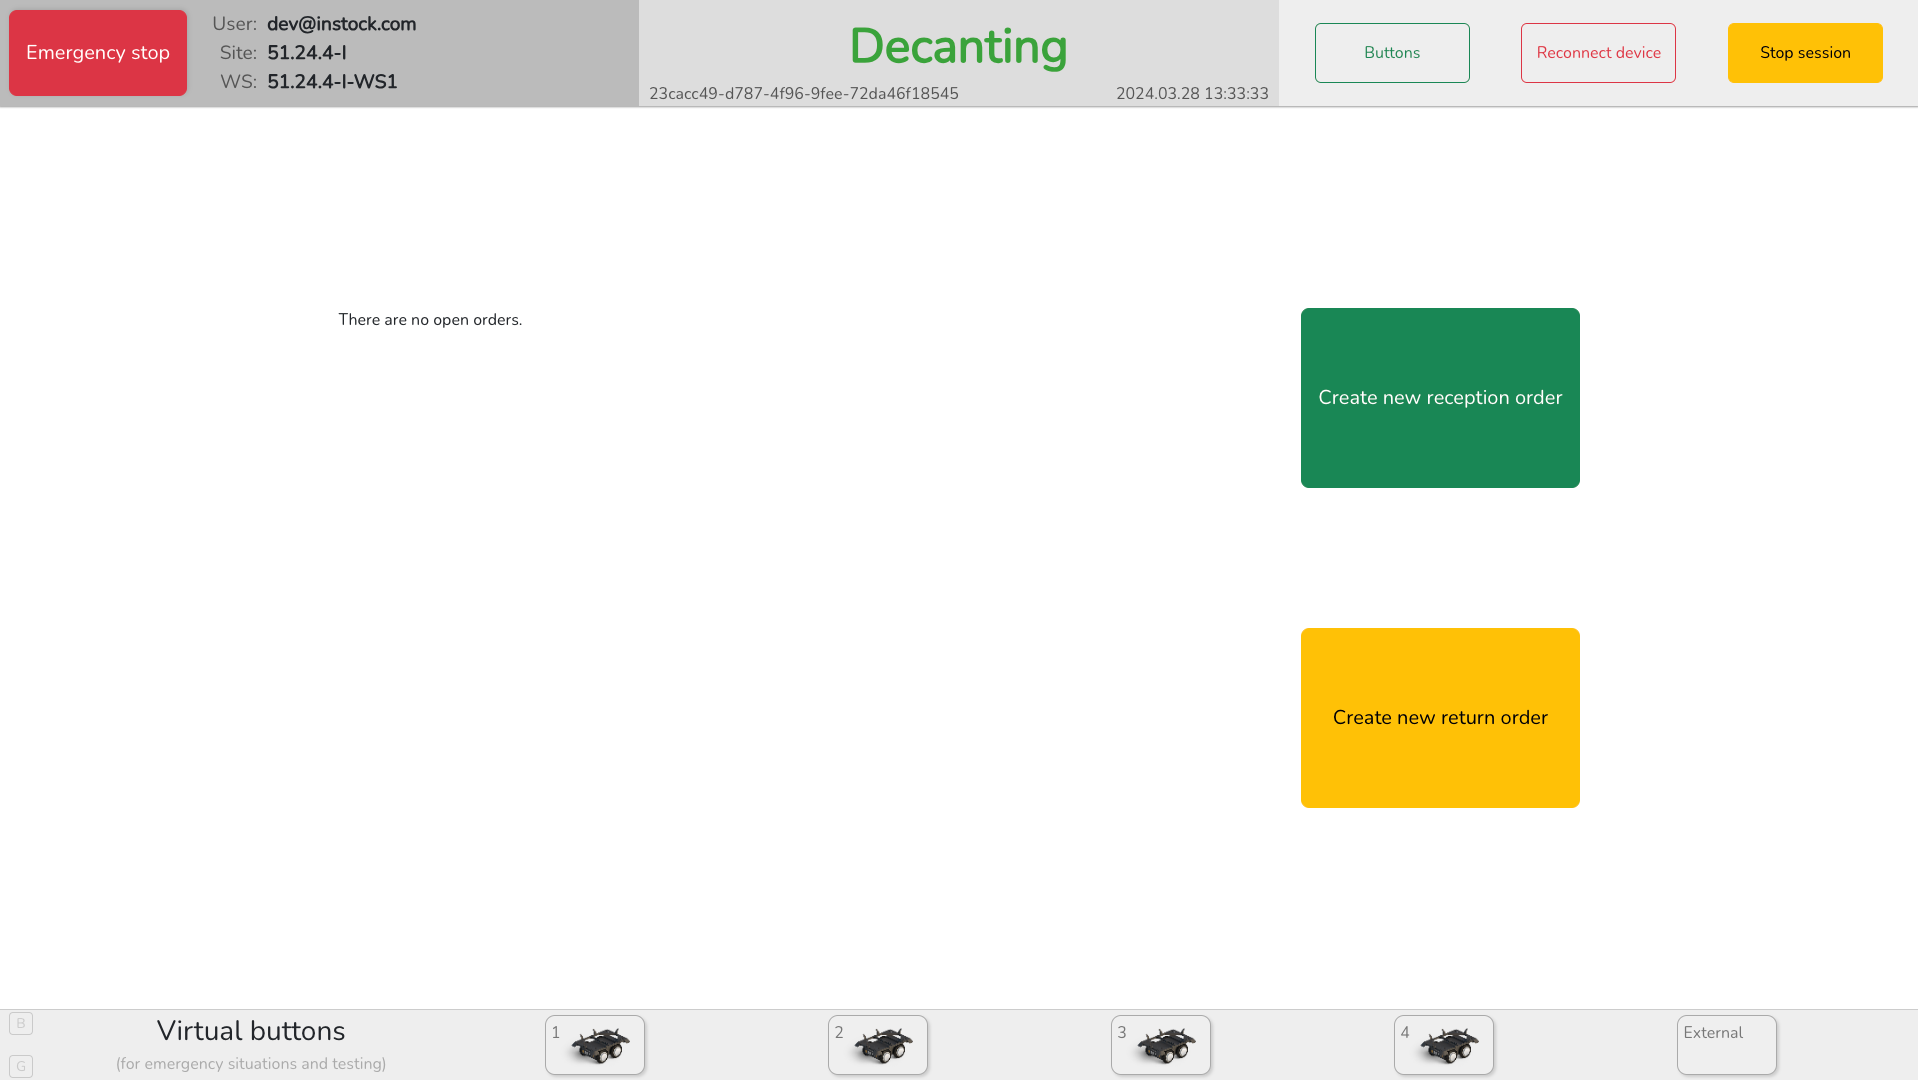
- Incloud shows the list of open reception orders for the current Instock site. Each reception order represents either supplier order or customer return order already open for decanting. Associate may also start a new supplier or new return order.
- Associate taps “Create new reception order”.
- Incloud generates the reception order ID and displays it on the screen. Such order ID will continue to be visible in UI while the Associate performs decanting.
- If necessary, the Associate adds a description to the reception order via keyboard input. Here, associate may manually enter or scan PO or ASN.
- One or several robots arrive with empty bins at the workstation’s channel(s).
- Incloud indicates one channel for decanting and the respective put-to-light is glowing.
- Incloud presents a choice of bin partition layouts for a given empty bin for Associate’s choice.Associate breaks carton/packaging of products to be decanted. Associate selects partition layout for a bin.
- Associate inserts dividers respective to bin partition layout.
- Associate scans the barcode of a product with the barcode scanner. Incloud informs about an error, if no
article_idis found — such product cannot be decanted. Incloud doesn’t allow a mix of two different products in the same cell. - Associate puts a quantity of product into one of the cells inside the bin.
- Associate taps on the respective cell in the UI
- Asscoiate confirms product quantity put into selected cell.
- Associate may continue to decant products to other cells within the bin. However, the product’s barcode must be read each time for every cell, even if two identical products are in two or more cells of the same bin. Associate may click on any already filled cell and correct the quantity or tap the button “empty” (essentially, it plays the role of “undo”).
- Associate presses on put-to-light once the bin is filled. Robot leaves workstation with the decanted products.
- Incloud switches the associate’s focus to another channel with an empty bin ready for decanting.
If no empty bin is available at the moment, and robots are en route, Incloud shows “Summoning robots” message.
Decant products into ASRS #
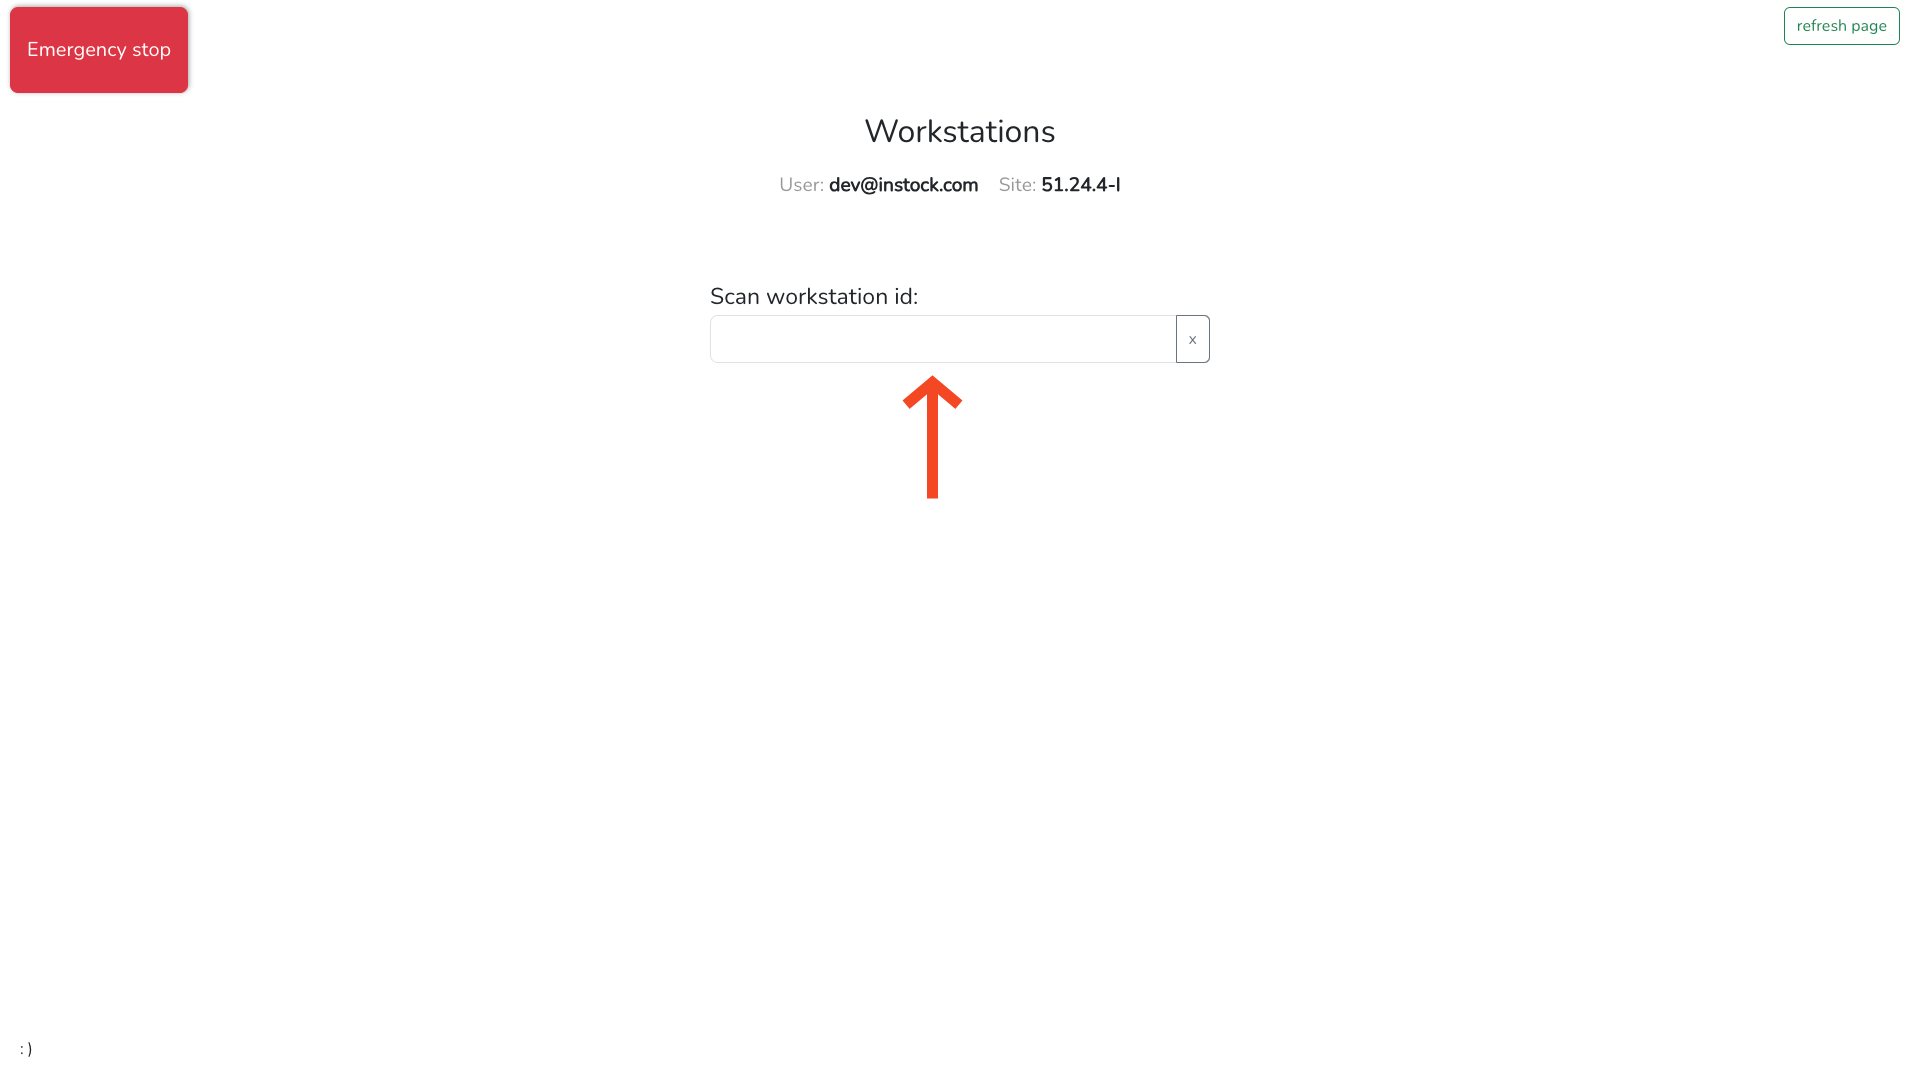
Scan workstation ID to begin worksession.
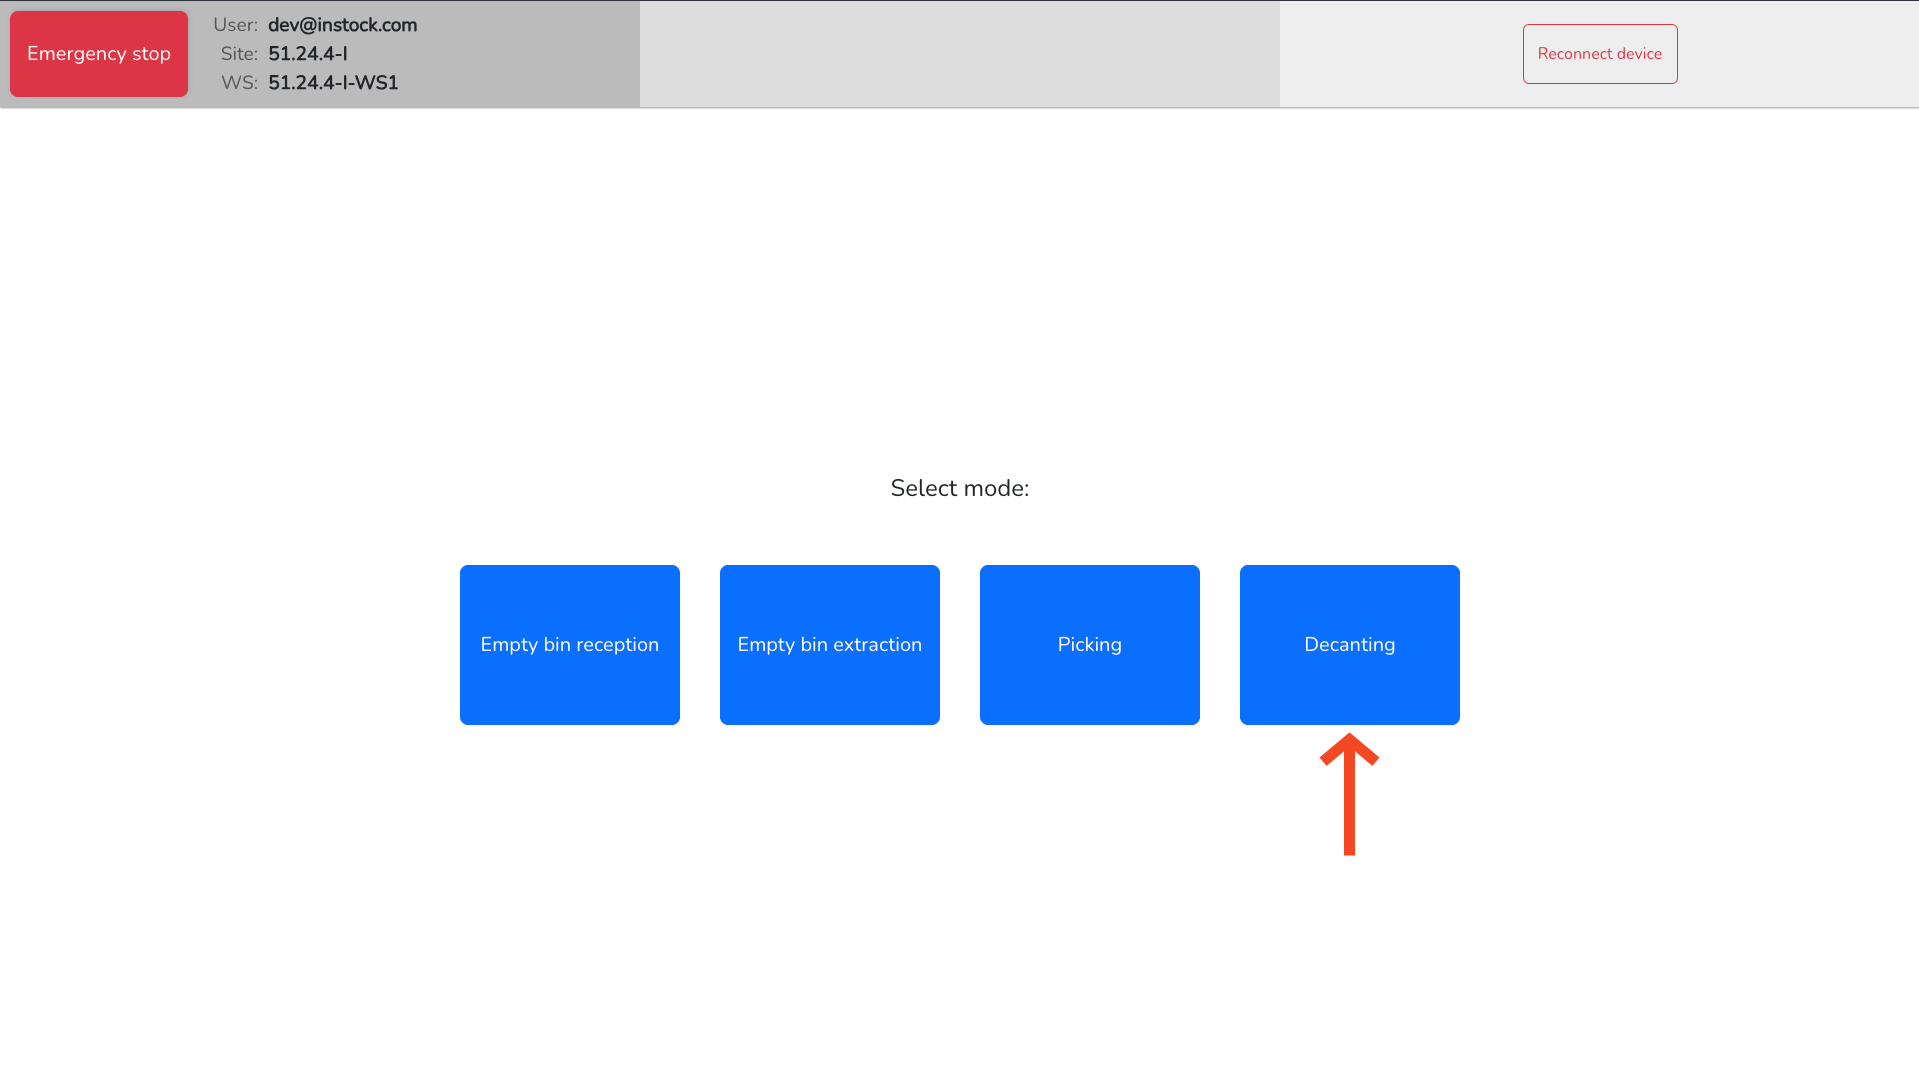
Select “Decanting” mode.
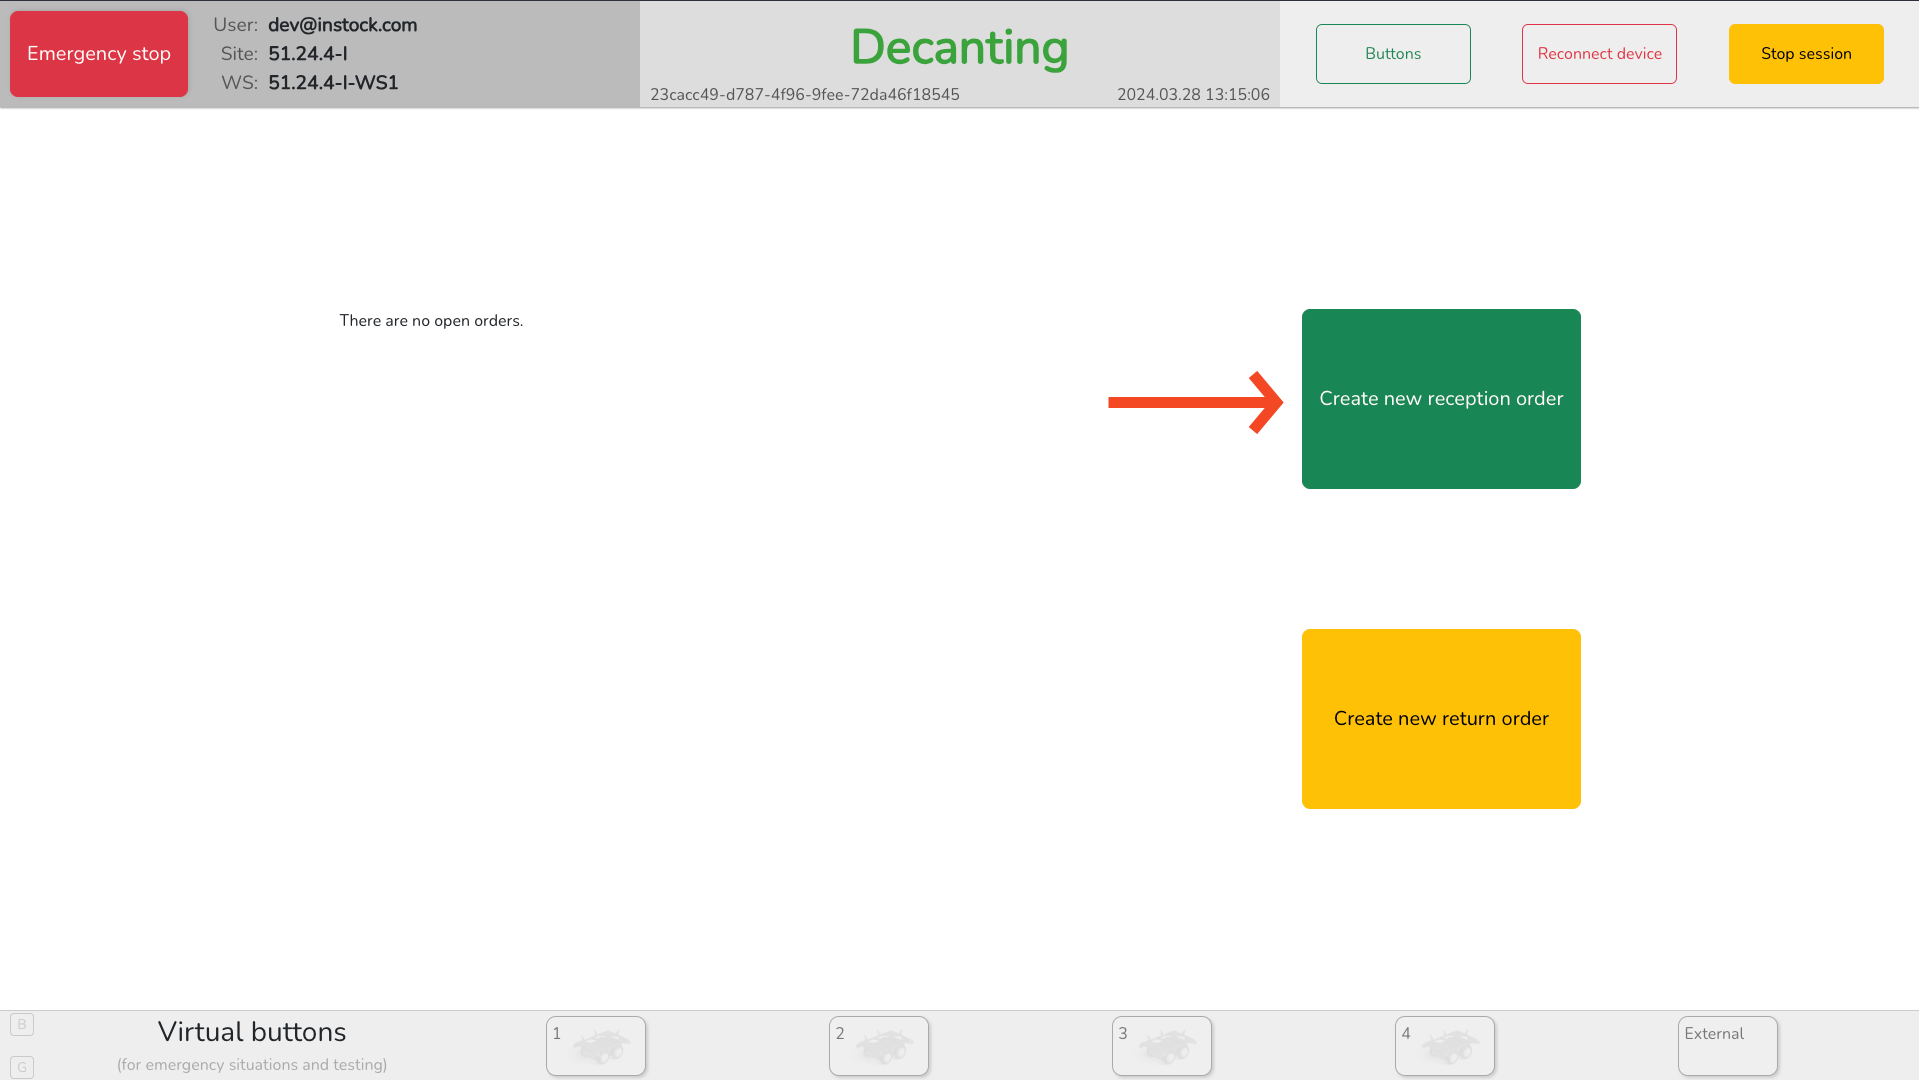
Select “Create new reception order”.
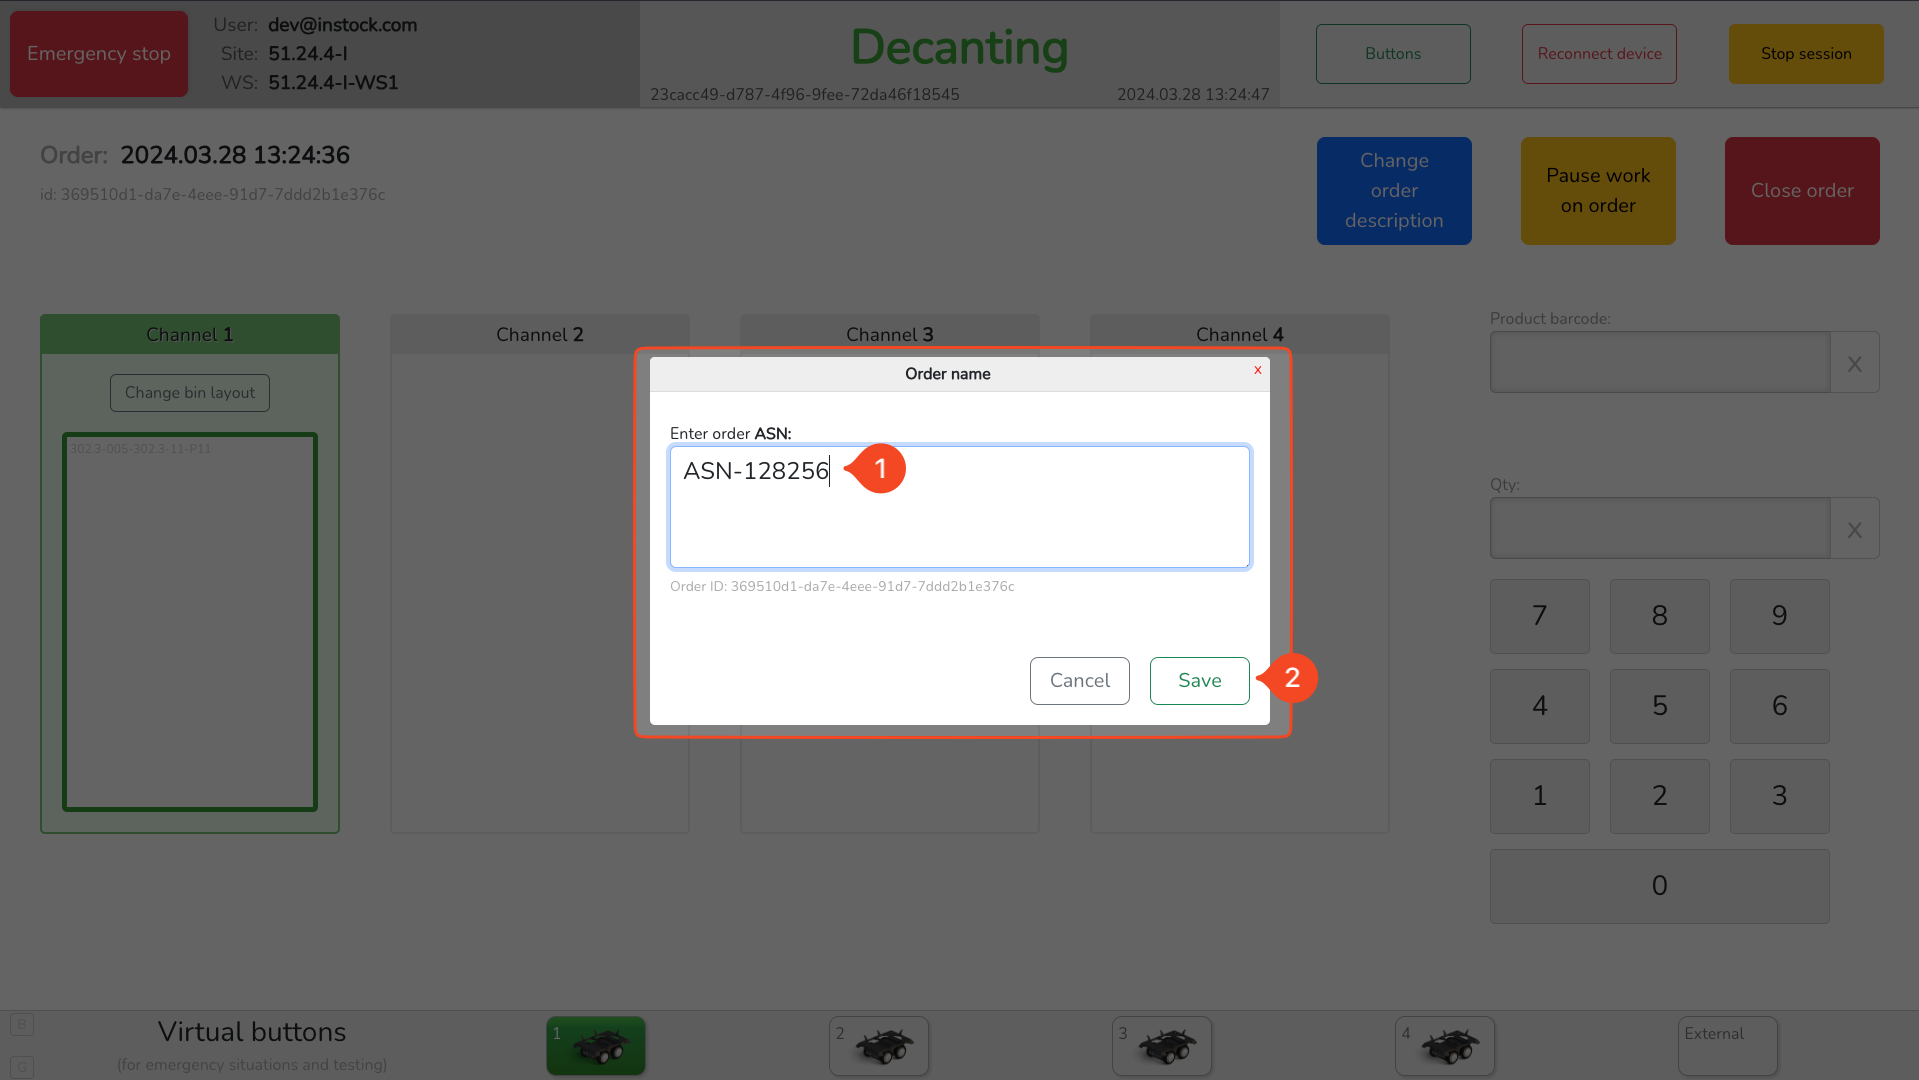
- Enter order description (1)
- Press “Save” button
By default, this field contains the timestamp of its creation, the field can be edited to enter any order name/description.
- Wait for robots to arrive at the workstation.
- As soon as the first robot arrives at a workstation channel, a put-to-light button will light up to identify the channel where you can decant.
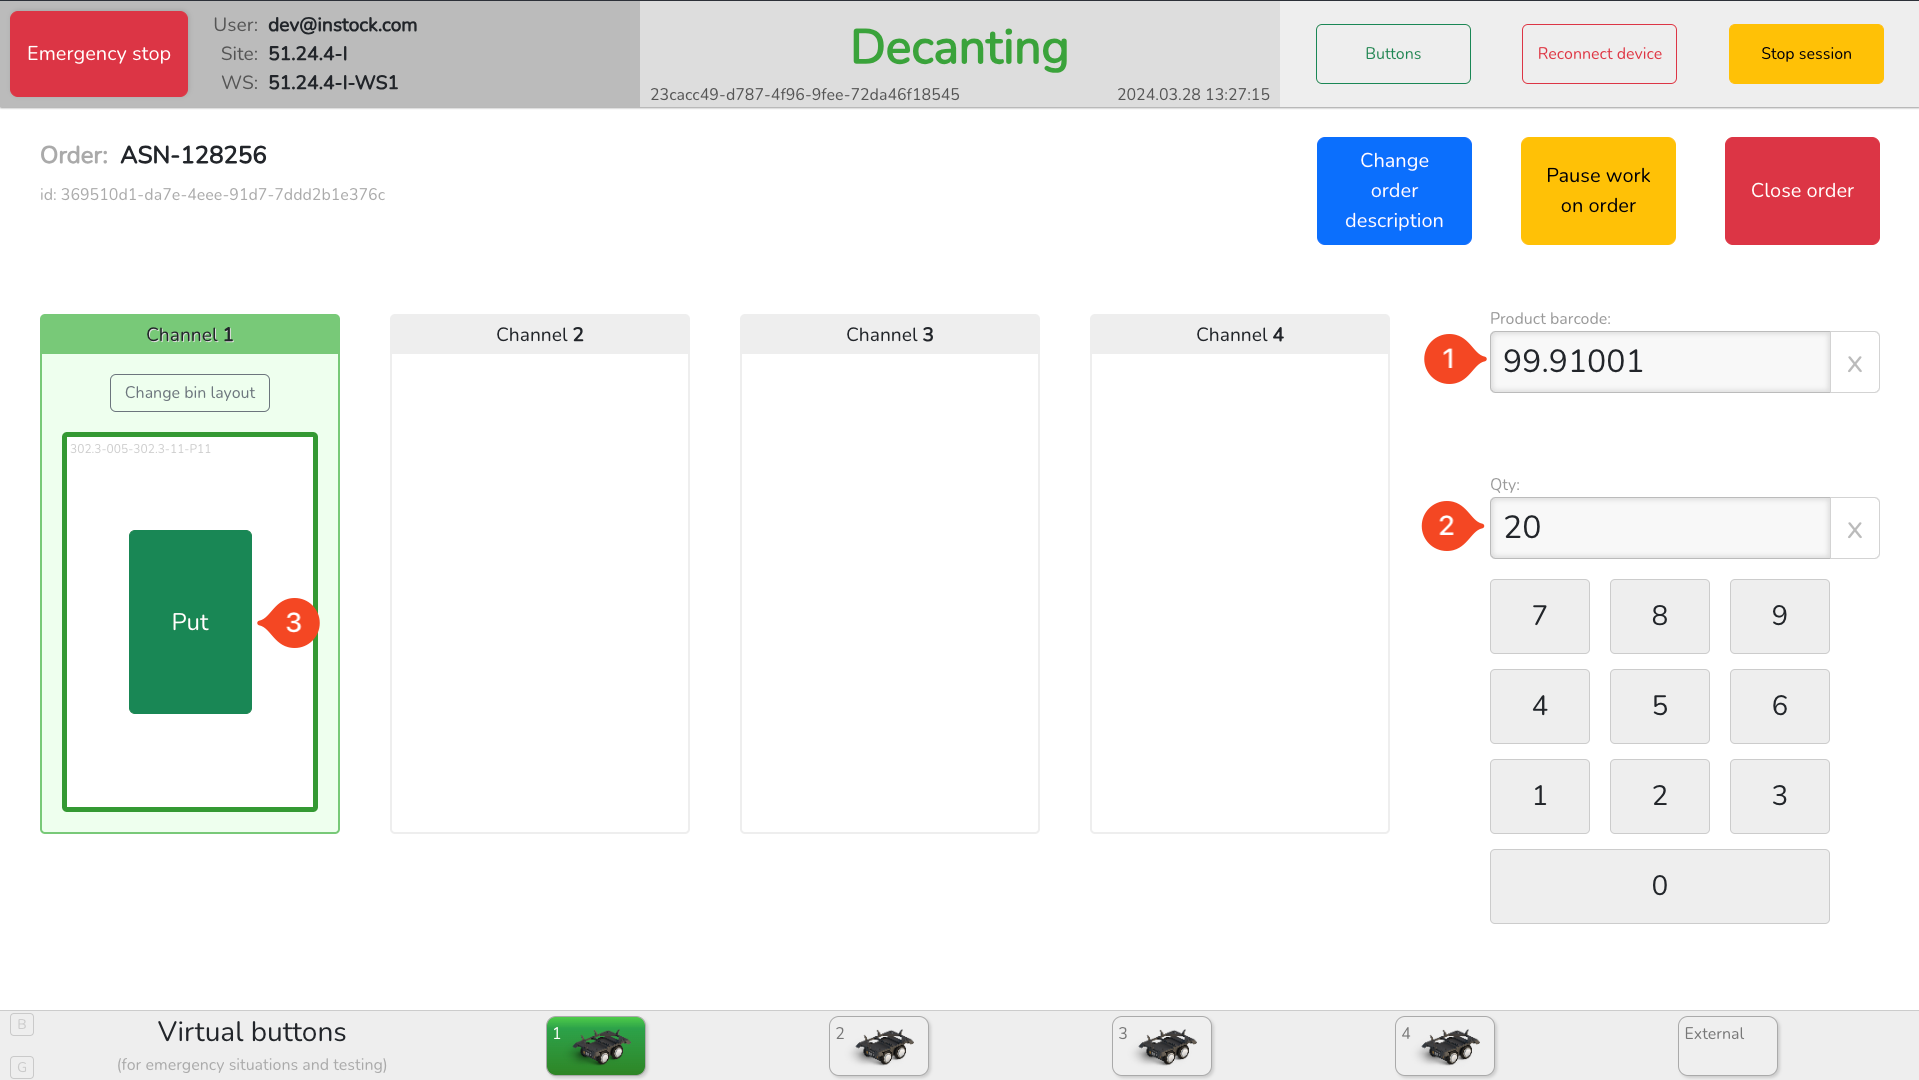
- Scan the barcode of the product to be decanted (1)
- Enter the quantity of product to be decanted (2)
- Put the product into the bin and confirm put by pressing “Put” button (3)
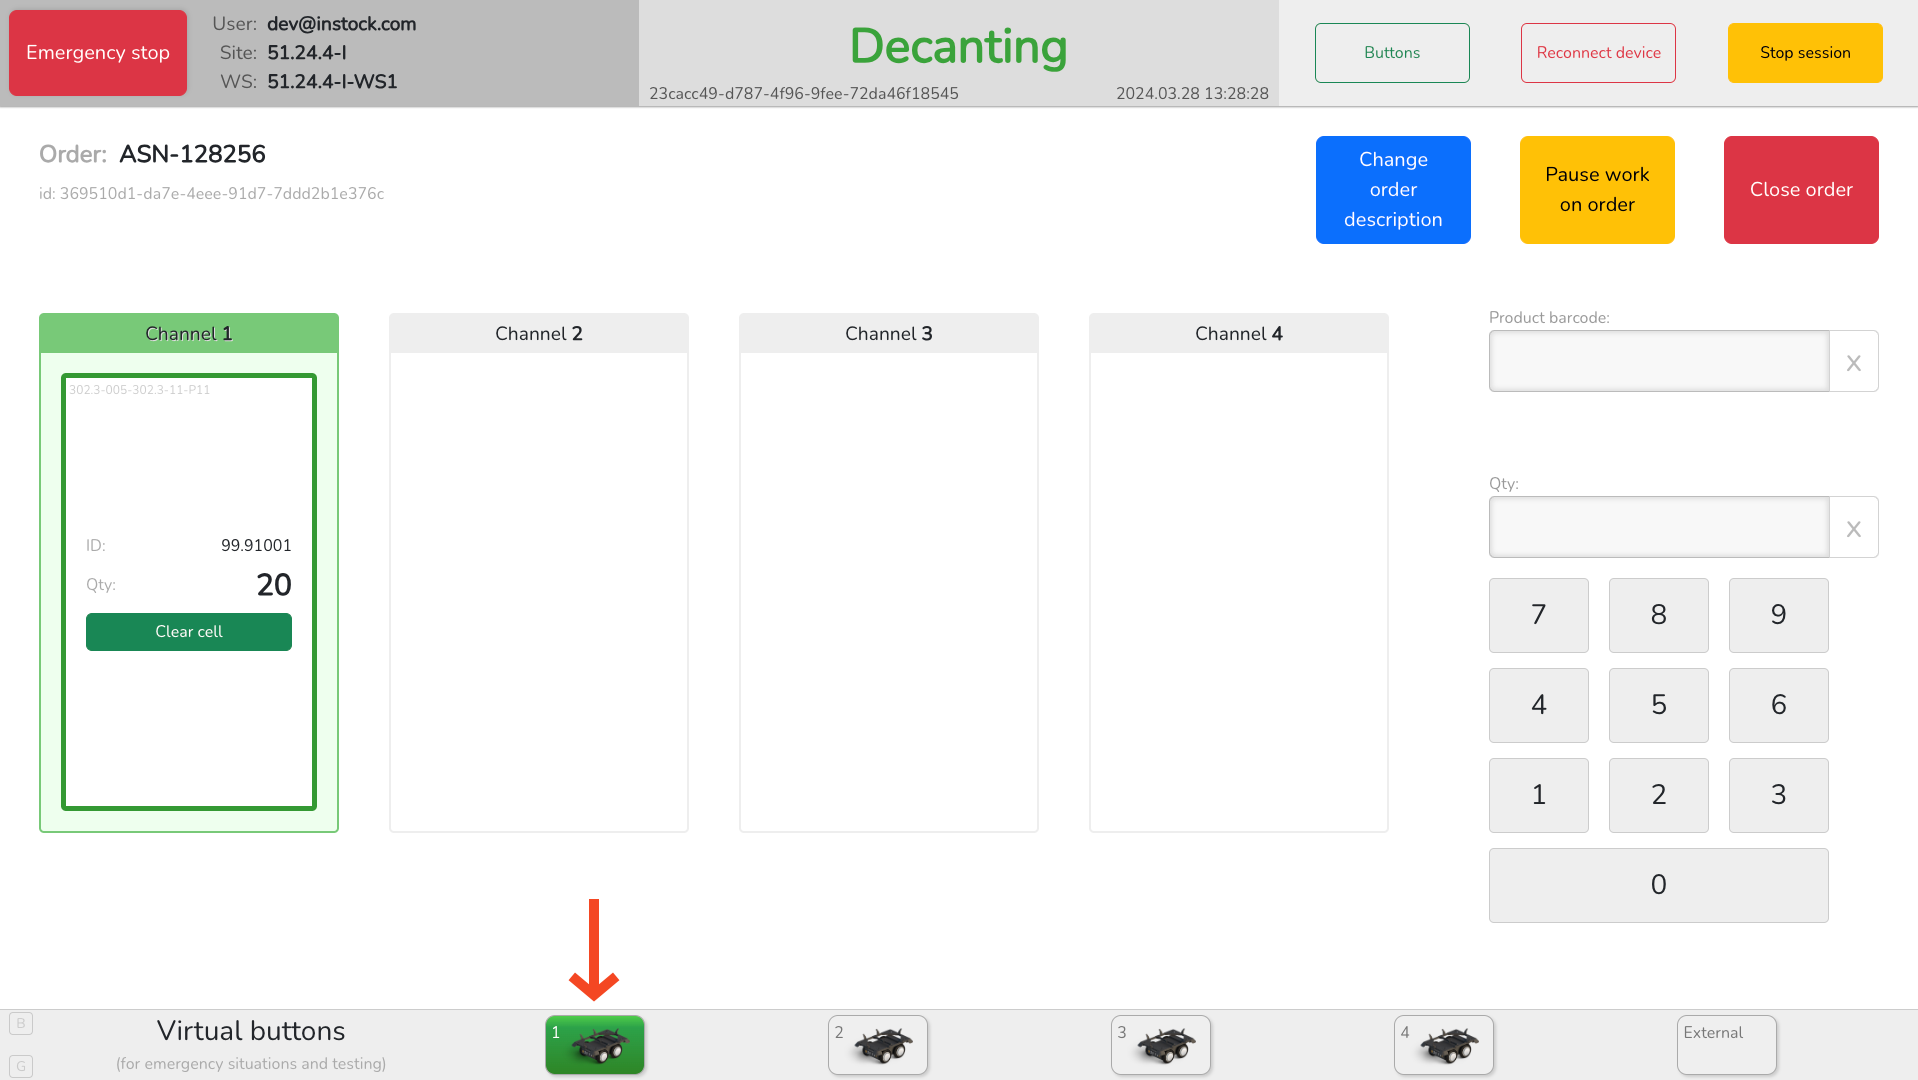
- As soon as put has been confirmed, you will see product ID and quantity put in the channel of the workstation. Now, the robot with the bin is ready to be released to store decanted product in the grid.
- Press the “put-to-light” button to release the robot. Shortly, inventory information will be updated in Incloud.
Close decanting order #
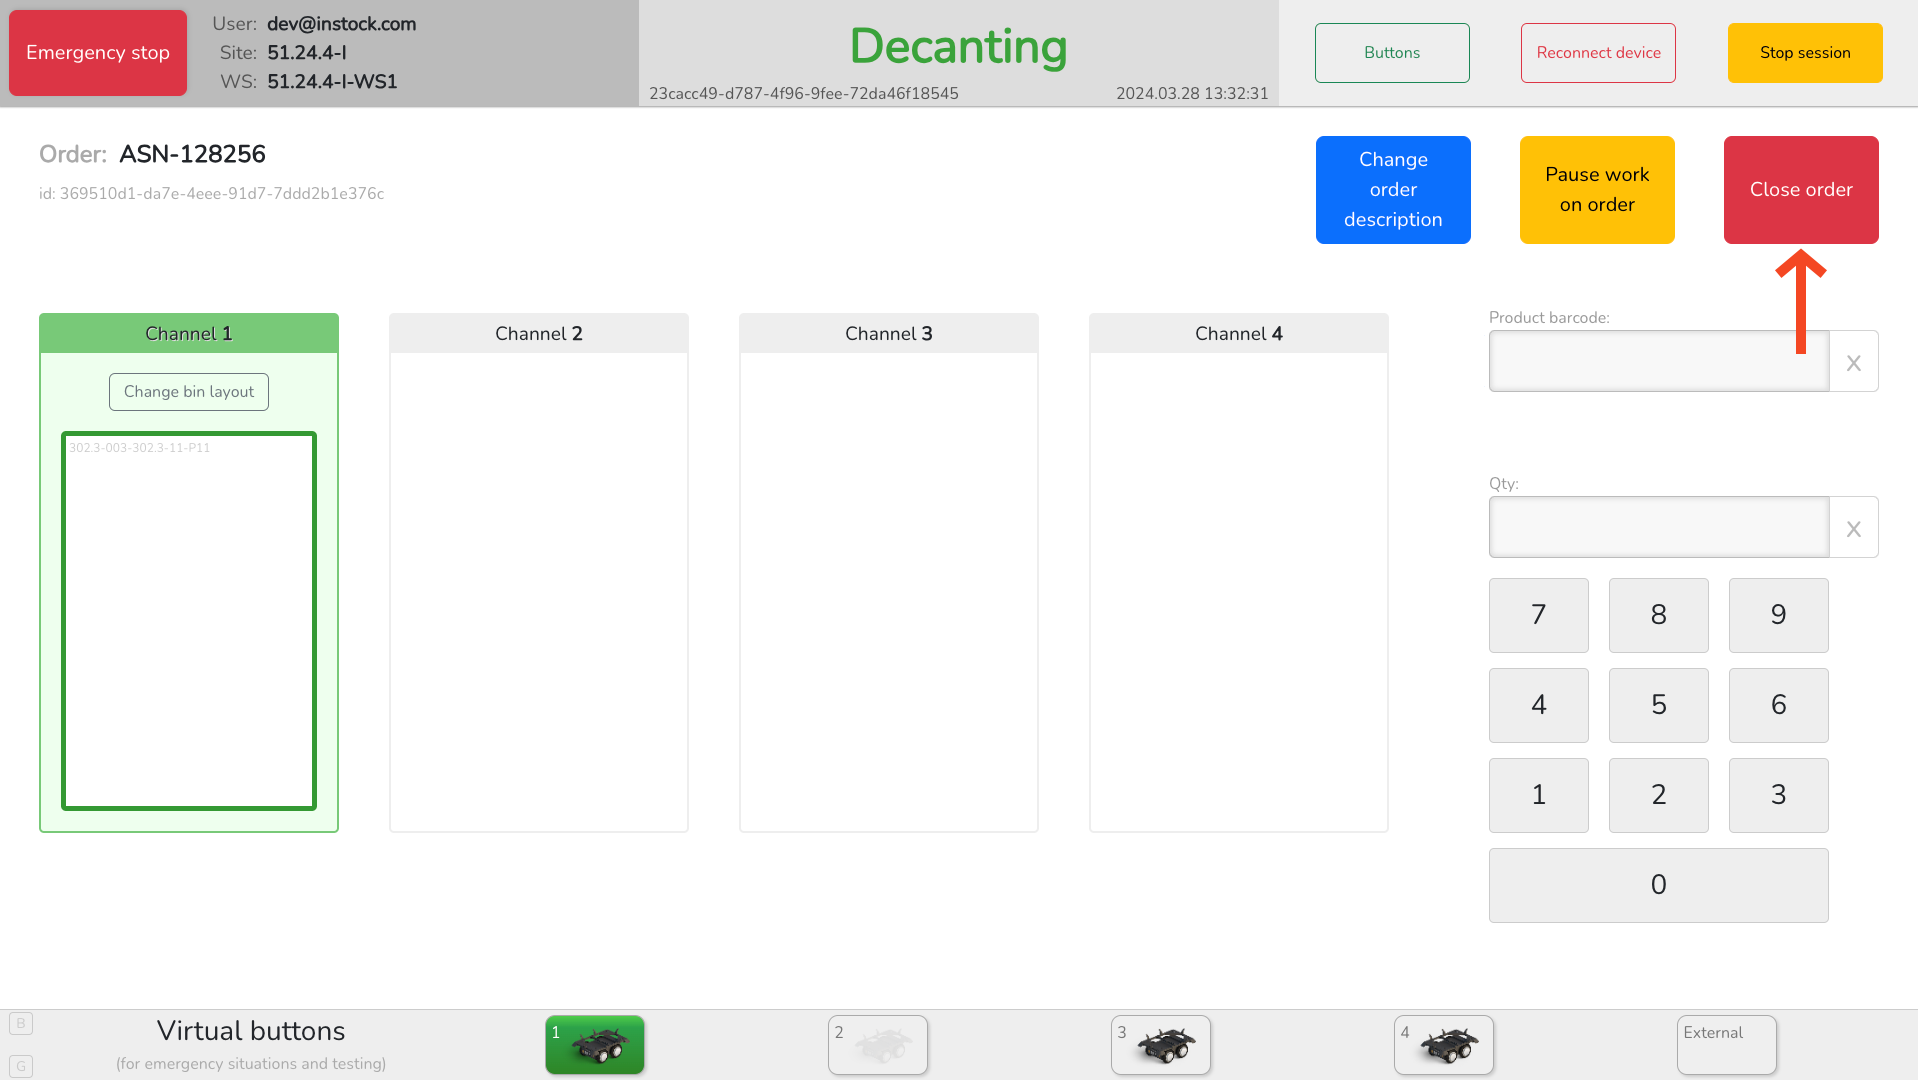
To close the decanting order, press the “Close order” button.
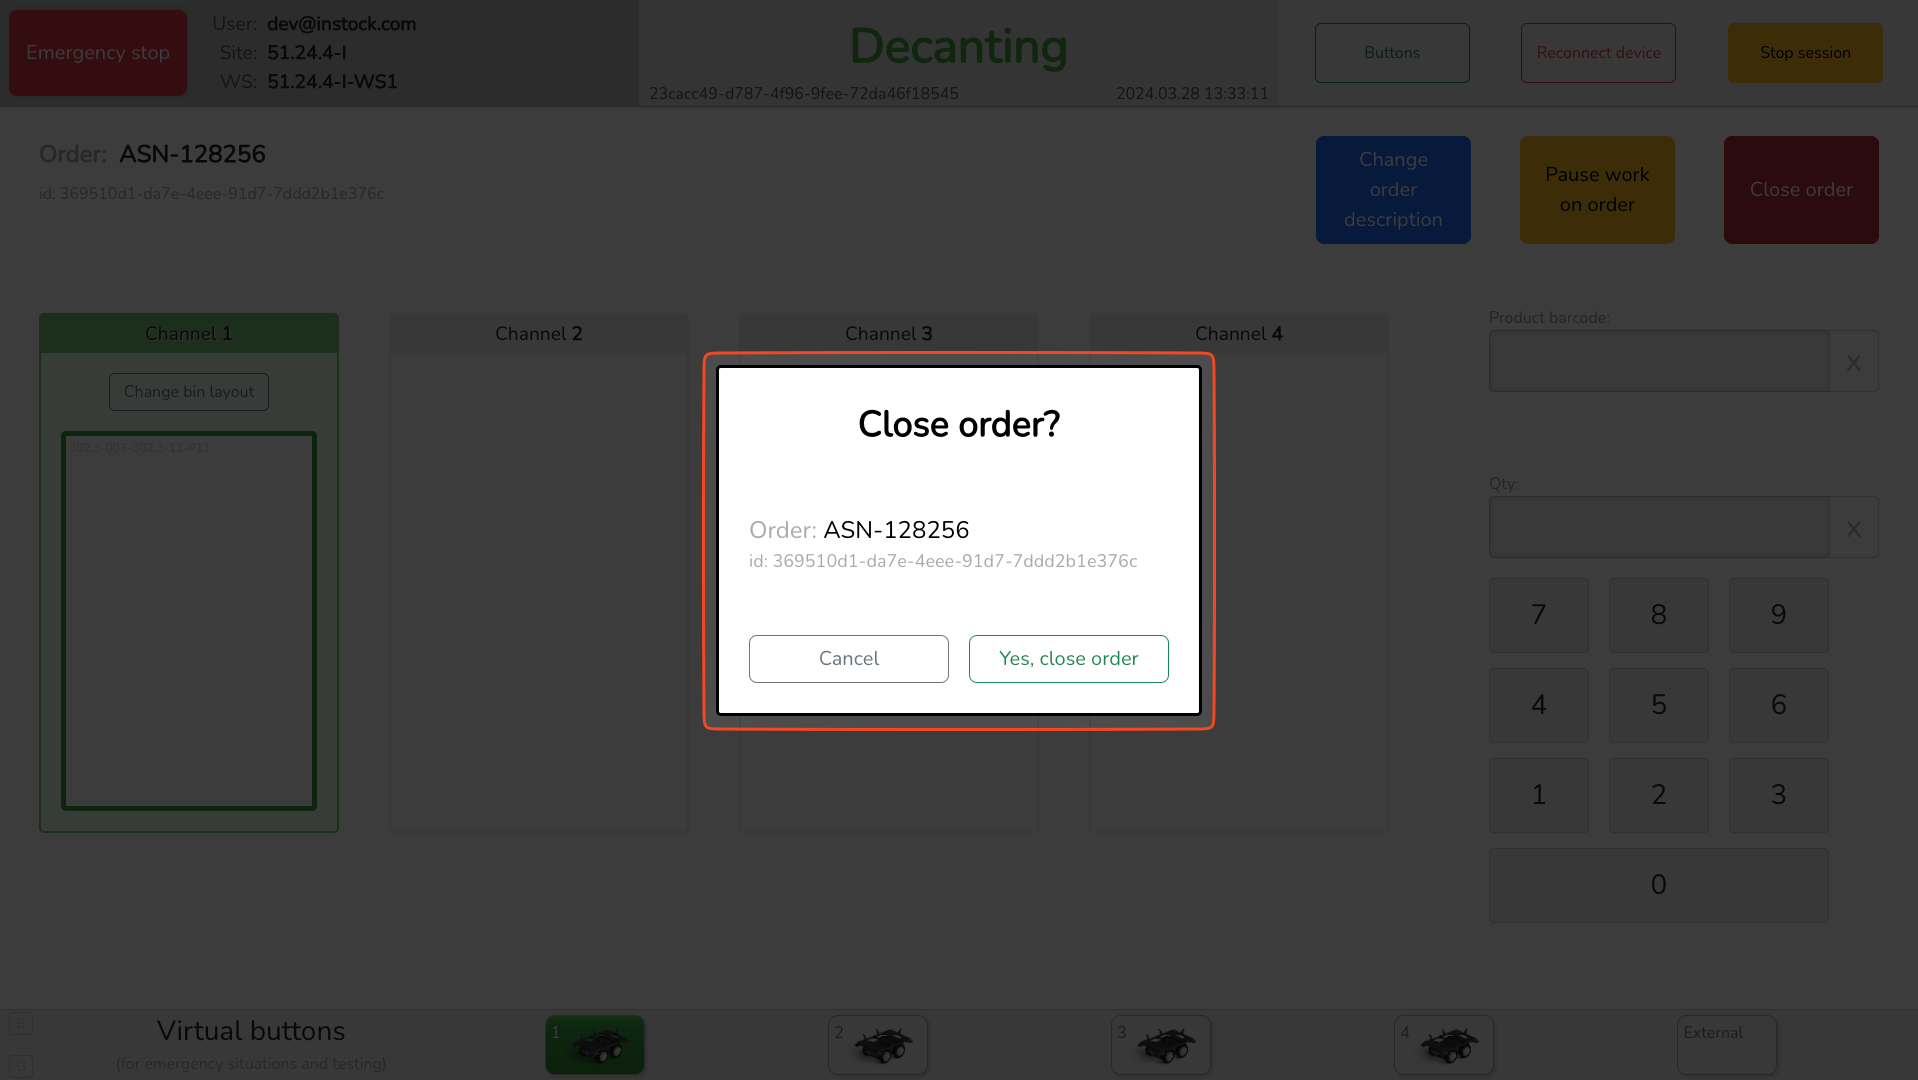
Make sure that all decanted products are registered via “Put” button before closing the order. Press “Yes, close” to confirm closing the order.
Upon confirmation, you will be prompted to Decanting mode main screen.
Pause decanting order #
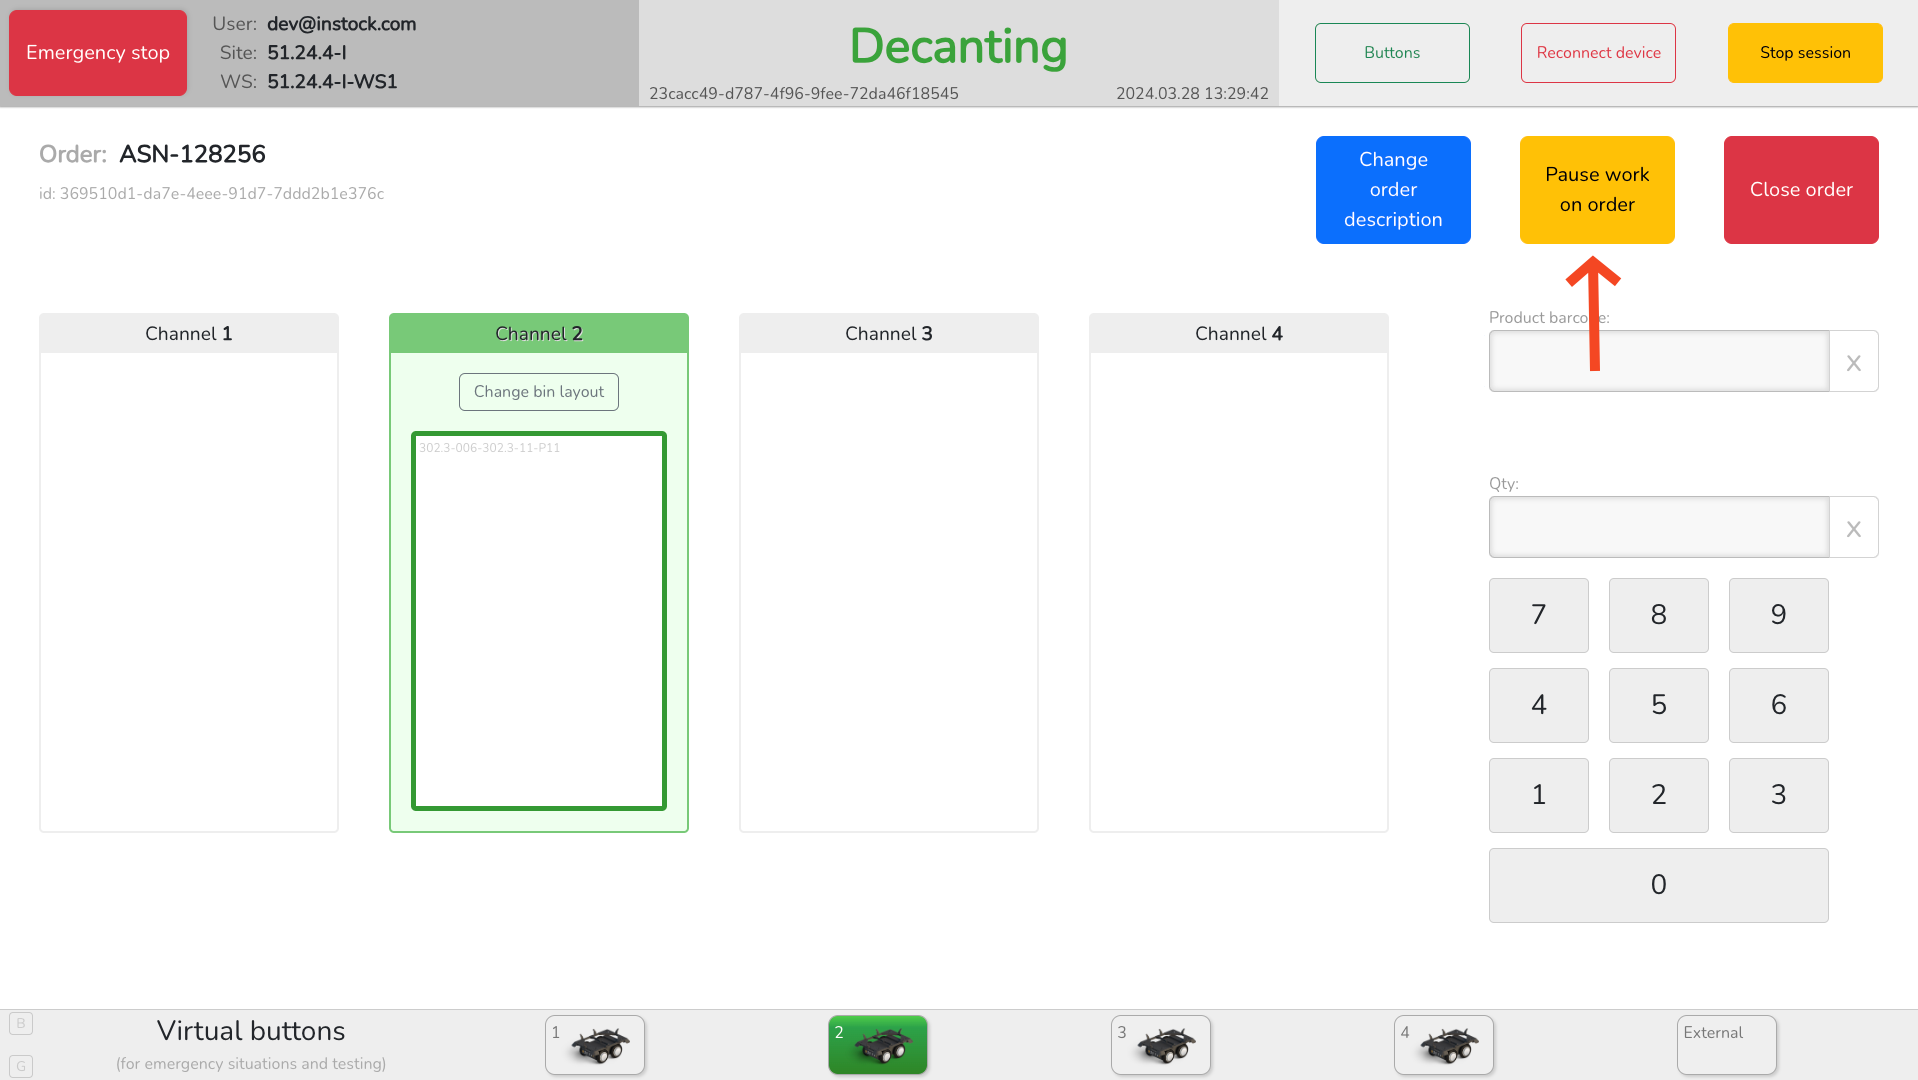
If you need to pause decanting session, you may press “Pause work on order” button.

Confirm that there are no products in the middle of decanting process and confirm pausing the order.
The decanting order will remain open and will be available to continue at Decanting mode main screen.
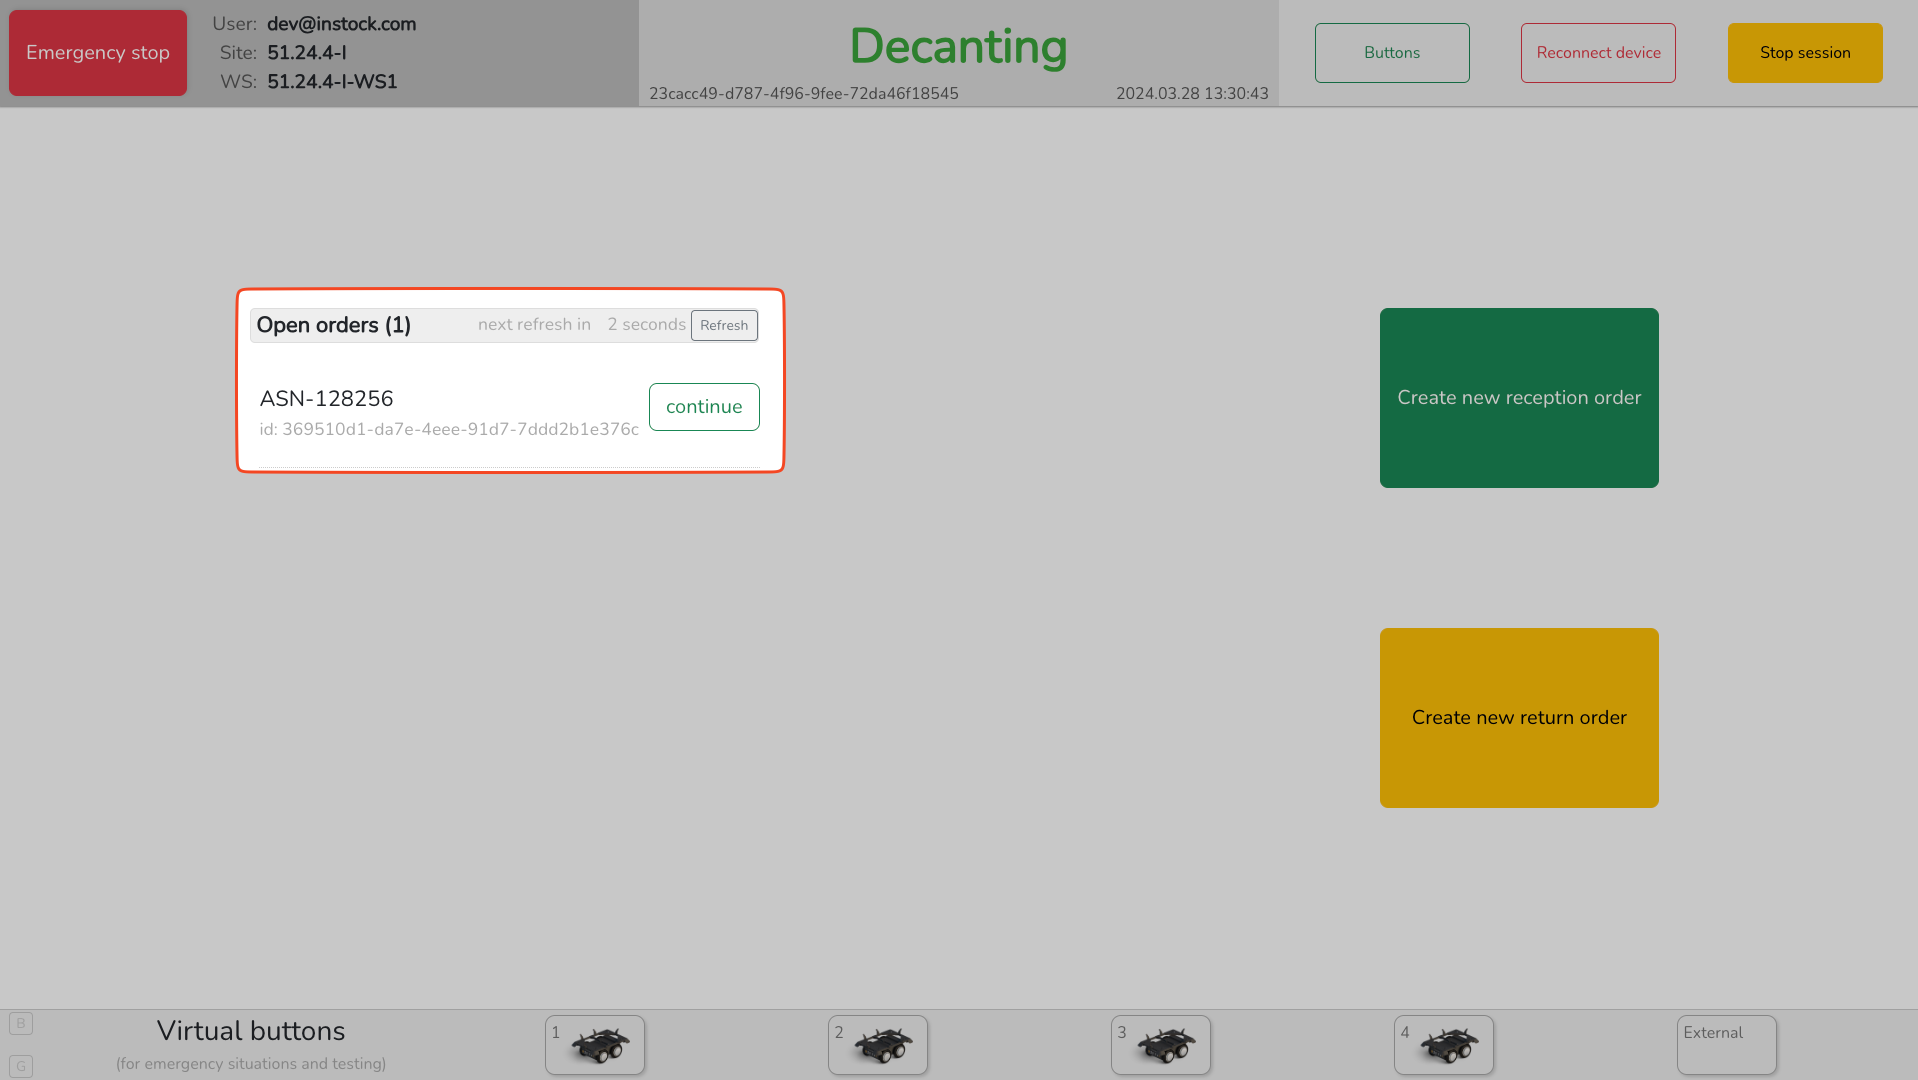
Continue decanting order #
To continue decanting order, simply press “Continue” button on the main screen of Decanting mode.
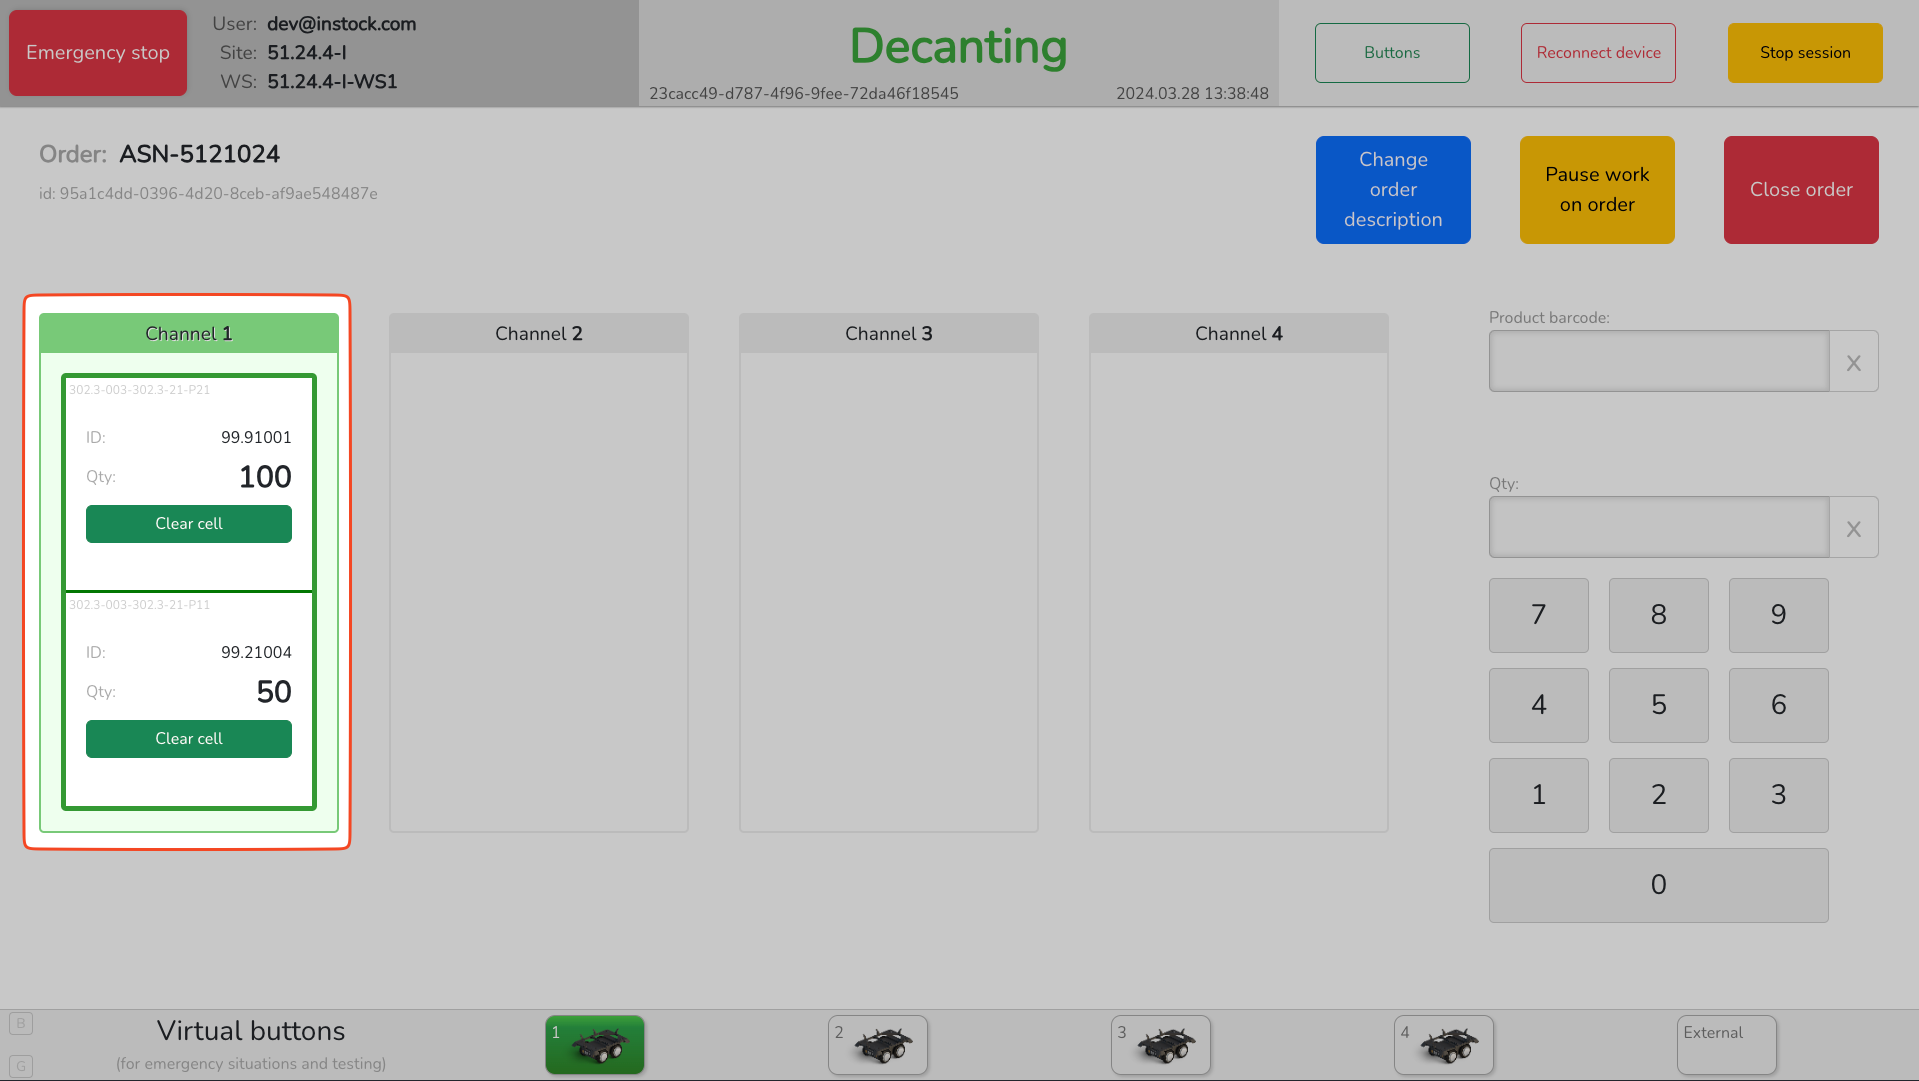
Clear cell #
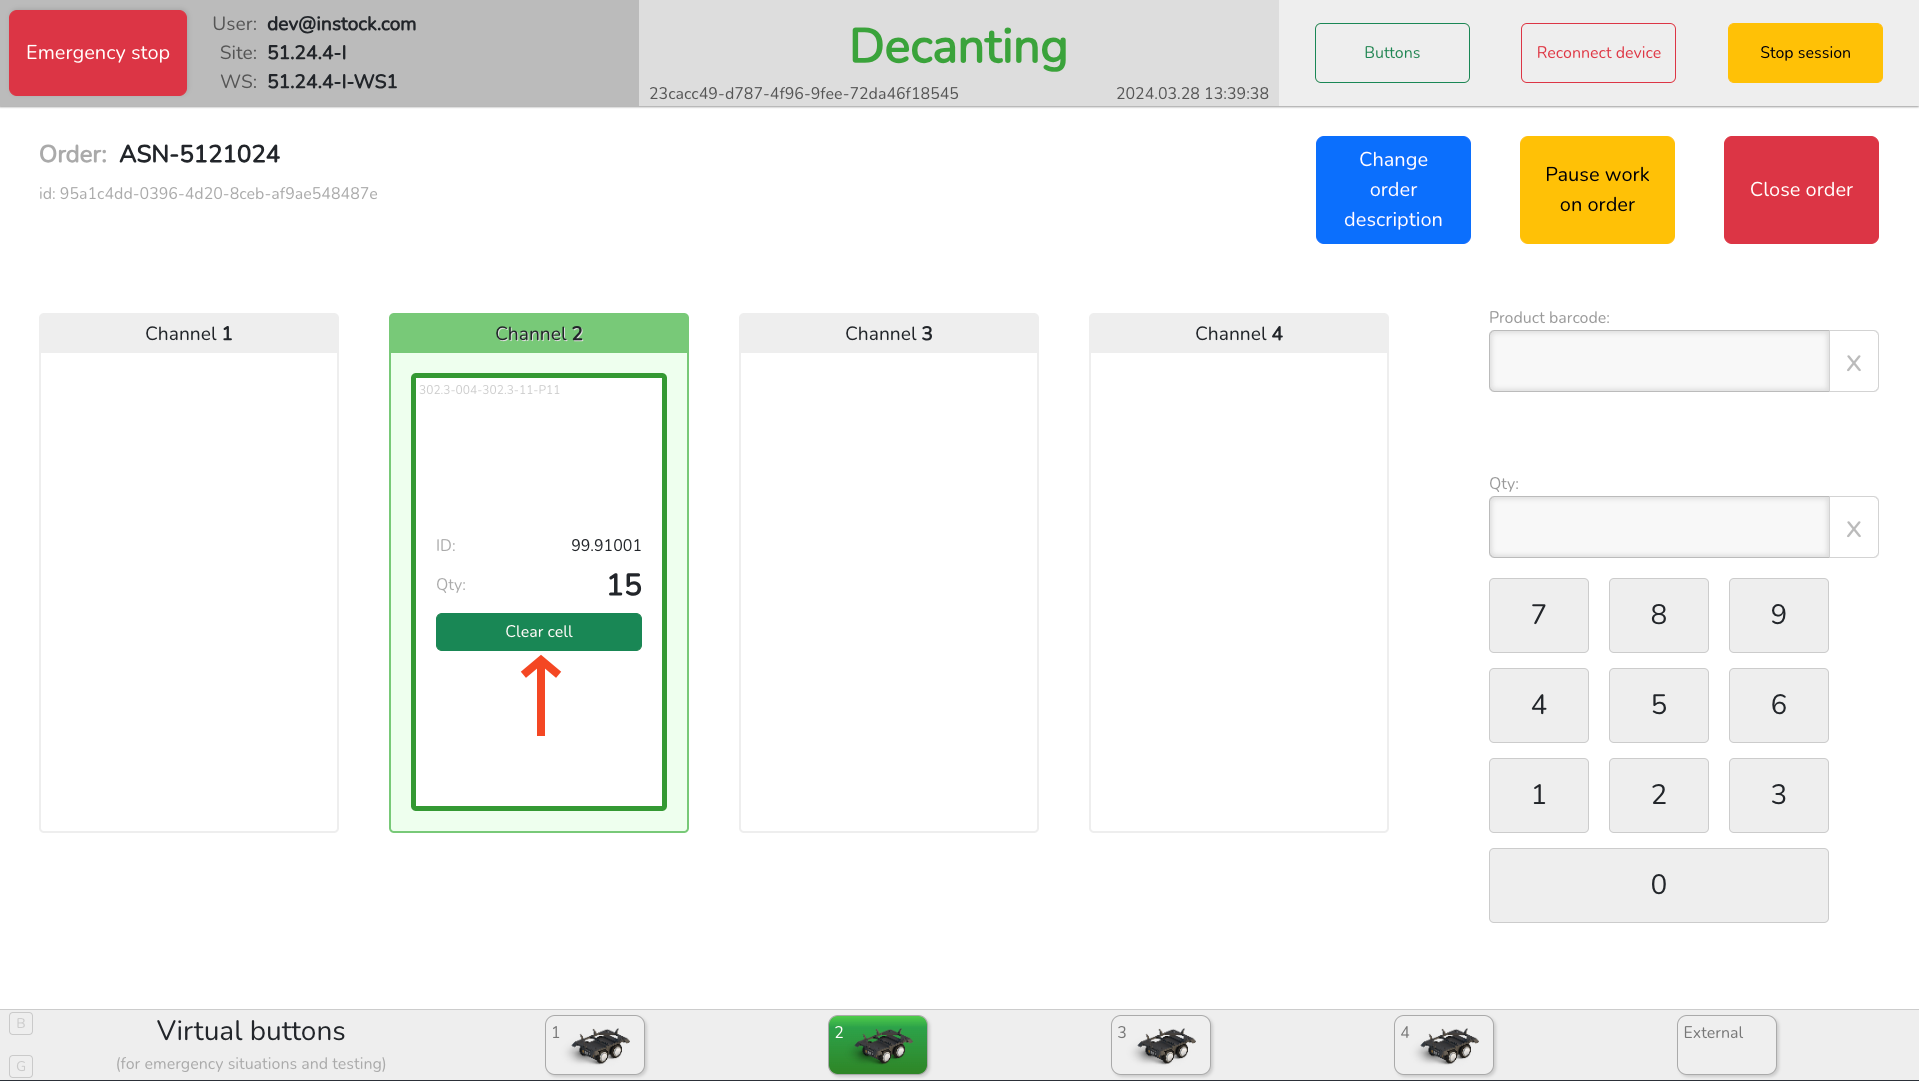
In case of a mistake during decanting products into the bin, you can press “Clear cell” button for a respective cell of the bin to remove the product from the cell.

After clearing the cell, you can remove, correct or add the product to the cell.
Change bin layout #
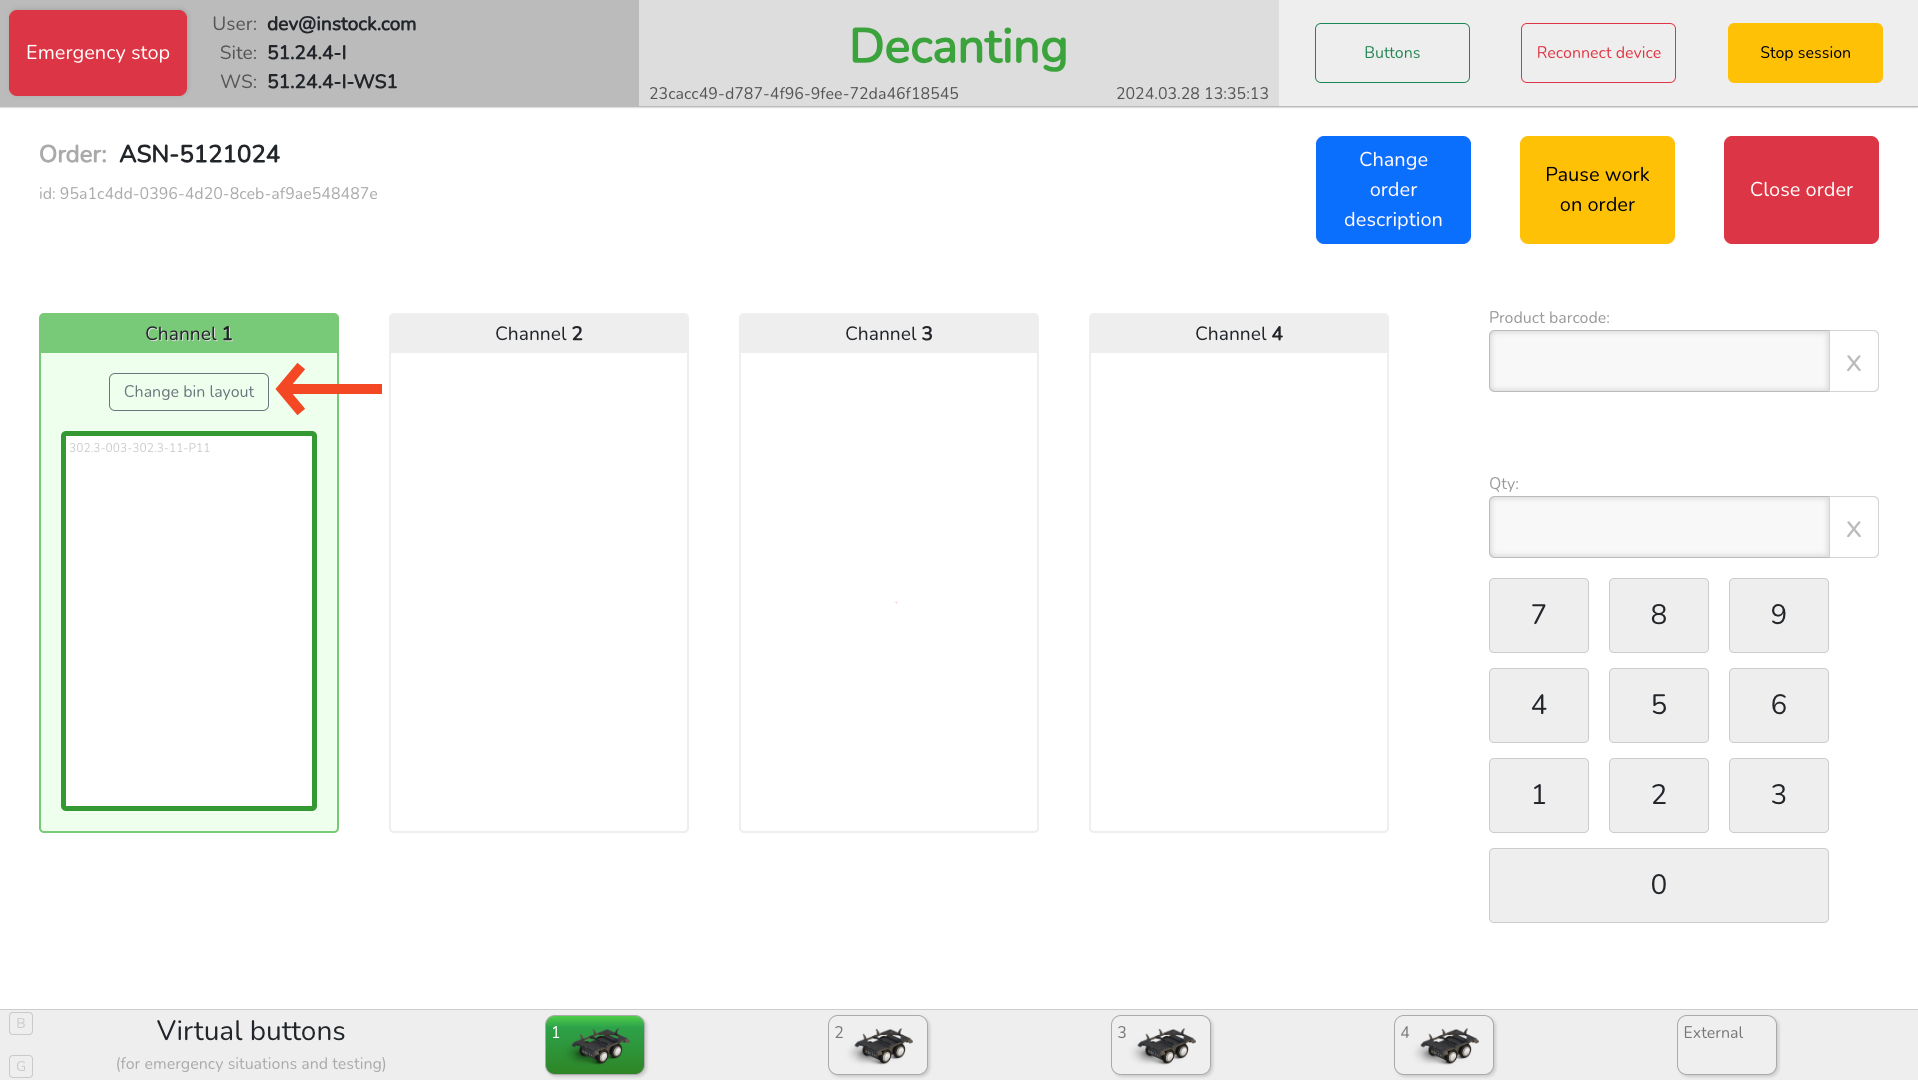
To optimize bin storage capacity, you can always change bin layout to accommodate more products. Press “Change bin layout” button.
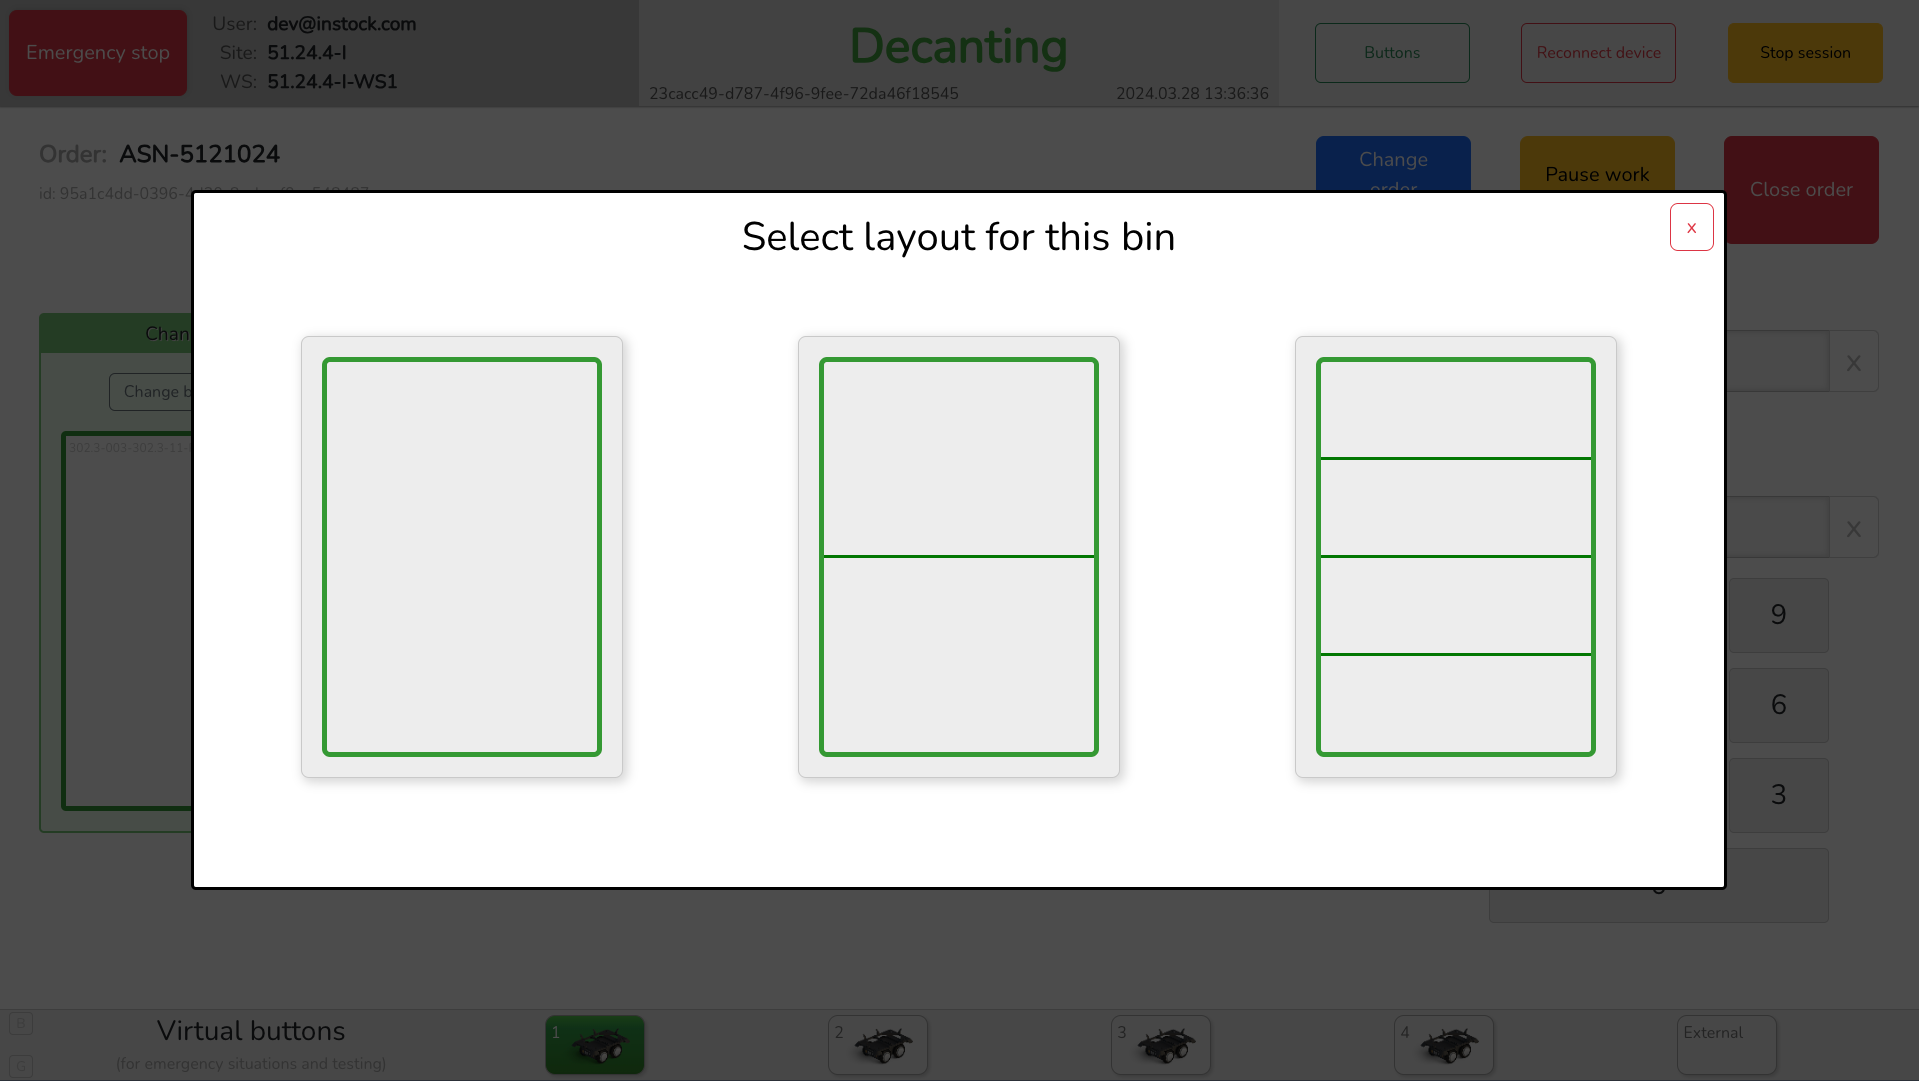
Select bin layout and insert appropriate dividers.
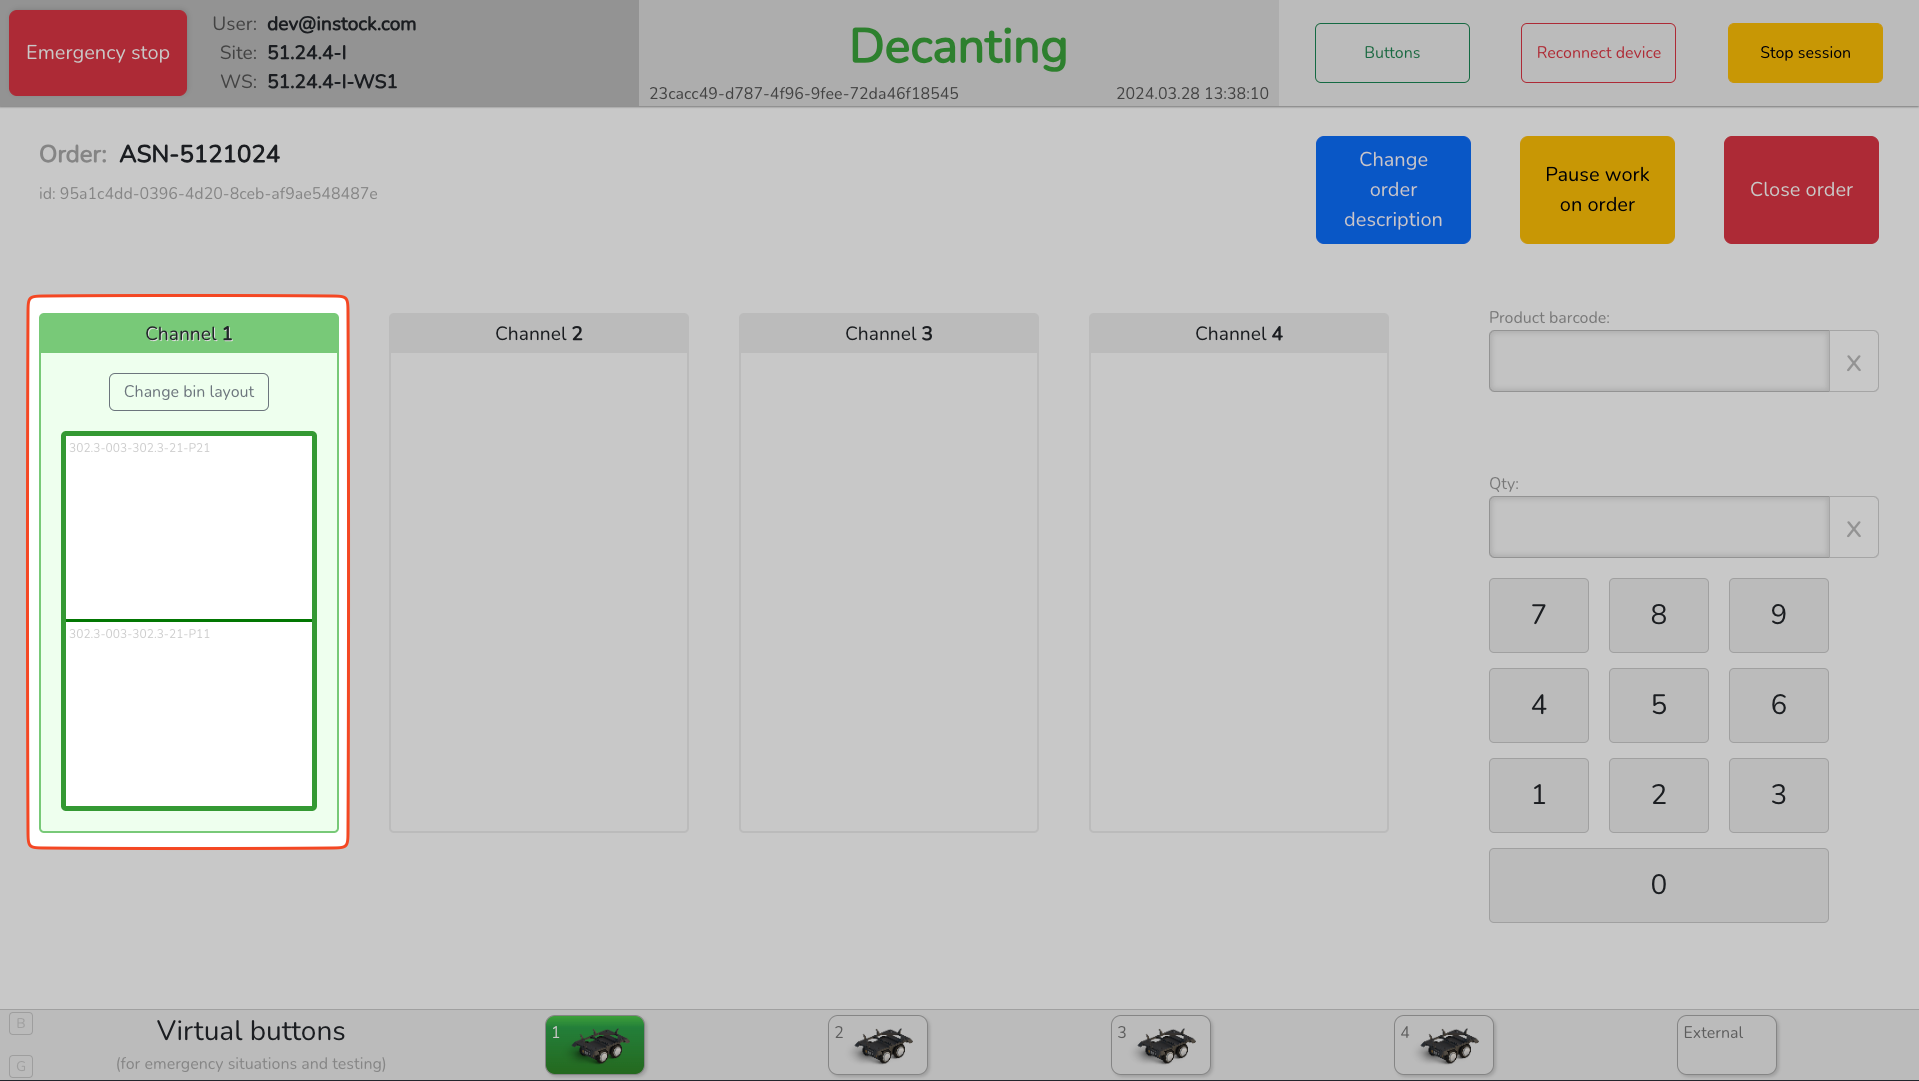
Selected layout will be displayed on the screen and you can continue decanting.
Decant products in each bin cell.